

Note: If you just require a basic guide to install Prepar3D please see this link to Download and Install Prepar3D
--------
If you are experiencing problems Installing Prepar3D please go through these steps to help resolve this
I have Included a checklist to confirm before you run the setup_Prepar3D.exe Installer
I have also Included steps to manually Install Prepar3D if running the setup_Prepar3D.exe fails to Install successfully
Please Note:
- If you already have Prepar3D Installed and you wish to reinstall the same version you must Uninstall/Deactivate first before you reinstall again
- Install the newest available version of your v3 or v4, Support will not be provided for legacy versions.
- Go though the Prepar3D System Requirements and confirm your computer meets at least the minimum requirements
----------------------------------------------------------
INDEX
I) Steps to confirm before you Install Prepar3D
II) Installing Prepar3D
------
III) Problems
------
IV) Manually Installing Prepar3D
-----------------------------------------
l) Steps to confirm before you Install Prepar3D
Please check and confirm these 7 steps before you you Install Prepar3D
Step 1
PC Admin: Are you logged onto your windows user account as administrator ? If not log in now as administrator Or Create an administrator user account and then log in
---------
Step 2
Update: Is your Windows Operating system up to date ? Run the Windows Updates and Insure you Install all Important updates available.
---------
Step 3
Hard drive space: Do you have the required hard drive space to Install Prepar3D ?
You will need at least 45 gig of hard drive space to Install Prepar3D
* 15 gig of this hard drive space will be needed on your C Drive Operating system for the repair Installers.
30 gig of hard drive space is required to Install the Core prepar3D folder. Note: The 30 gig requirement is for a default Install (No 3rd party Add On's)
In total you will need at least 45 gig of hard drive space to Install Prepar3D
---------
Step 4
Good Download: Did you confirm the MD5 Checksum on the Prepar3D download ?
This is an Integrity test and will confirm if the download is good or not. If your download is corrupt or Incomplete Prepar3D will not Install. You can do this by confirming the MD5 Checksum on the download.
Please see the link below for steps to take to confirm the MD5 checksum on the Prepar3D download folder
http://www.prepar3d.com/forum/viewtopic ... 3&t=126465
---------
Step 5
Antivirus Software: Did you Disable your Antivirus Software and Firewall ?
Insure you temporarily Disable both your Antivirus Software and the Firewall as they may disrupt the Install process
If your using Windows Defender, Turn Off "Real Time protection" and " Controlled folder access" for the duration of the Install process
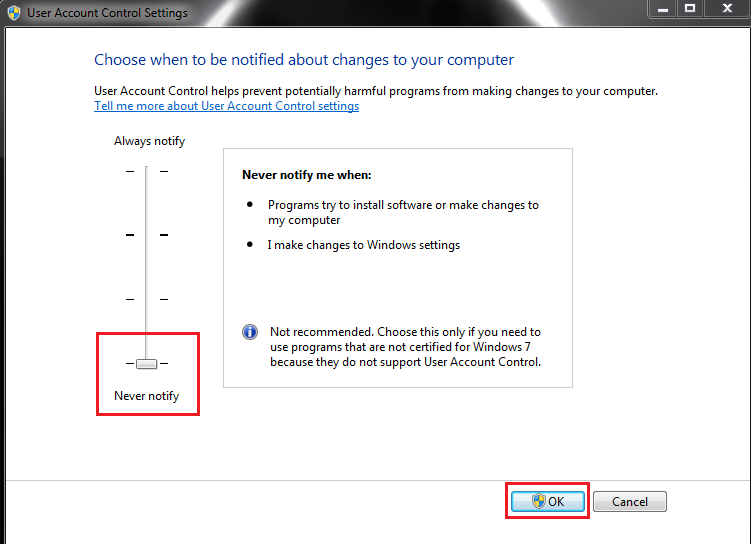
Disable your UAC User Account Control from possibly disrupting the Install Process. Type UAC in your windows search bar. Click Never notify and Click Ok
---------
Step 6
Task manager: Close any programs running in the background that may disrupt the Install process, Programs like Team_Viewer, MSI Afterburner, Evga Precision and so on.
Open the Task Manager and close any of these types of programs down from running in the background
---------
Step 7
USB Devices: Unplug all USB Devices from your computer Including extra monitors and Sound cards (except keyboard and mouse) If the Install process is successful you can then plug them back in again
=========================================
ll) Installing Prepar3D
After you check and confirm the above 7 steps you are now ready to run the Installer again
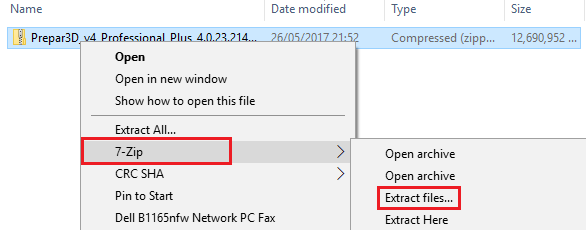
You need to first Extract the Zipped folder Before you run the Installer. Use an extract tool like 7zip to extract the Zipped folder
Note: If you encounter error messages when extracting the zipped folder please see This Link
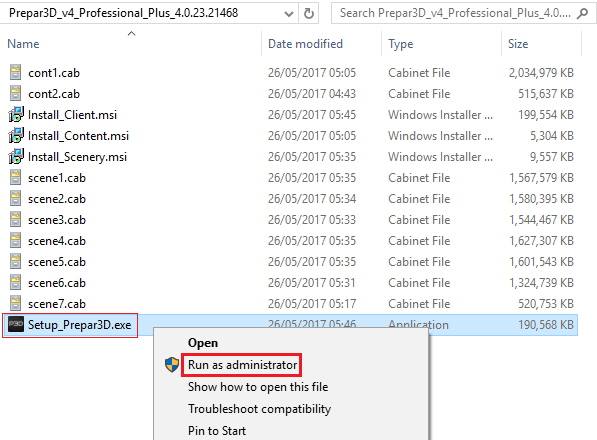
After you extract the zipped folder Run the Prepar3D Installer as administrator.
Right click on Setup_Prepar3D.exe and Run as administrator (Important)
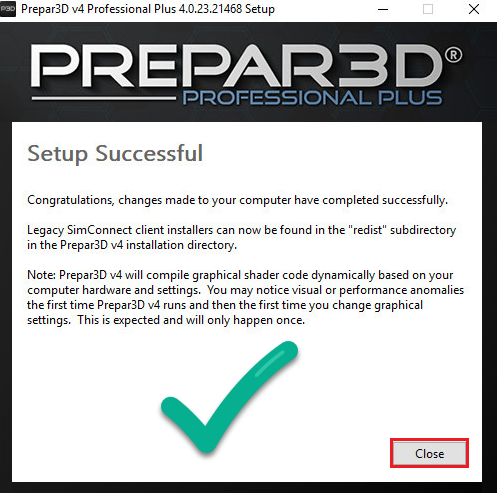
You will see this message when the Install process has completed.
Restart your computer, You are now ready to Activate Prepar3D
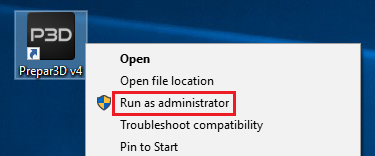
To activate Prepar3D, Right click on the Prepar3D Icon and run as administrator, follow the prompted steps to activate
===========================================================
===========================================================
III) Problems
Additional Steps to check
If you are still experiencing problems Installing Prepar3D try these 3 additional steps one by one
1) Corrupt user account: Its possible you may have a corrupt windows user account
Create another Windows User Account with Admin privileges, Sign into this new account and then proceed with the Install process
-------------
2) System File Checker: The System File Checker is a utility in Windows that allows users to scan for corruptions in Windows system files and restore corrupted files
For a guide to use this tool Click here
-------------
3) Special Characters Remove any Special Characters in your Windows User name, Characters like /\[]":;|<>+=,?*
Also insure you are Installing the most recent version available for your Prepar3D v3 or v4
----------------------------------
----------------------------------
Error messages during the Install process
Hash Value not correct: If you are receiving a message during the Install process "The hash Value is not correct Or "File not found" You will need to re download or download Individual files and then confirm the MD5 Checksum on the download folder to Insure you have a good download, Click here for Instructions
-------------
Could Not write Value: If you are receiving a message during the Install process Could not write value Complete to Key This message means there is a system permissions Issue on your system, Click Ignore the Install process will finish Ok and this will Not effect Prepar3D
-------------
Insufficient privileges If you are receiving this message below during the Install process
Installer has insufficient privileges to access this programdata\microsoft\windows\startmenu\programs\lockheedmartin
Follow these steps to give the proper permissions to your Start Menu
Navigate to the location below, Right click on Programs > Properties > Security, Then Click Edit
Local Disk ►ProgramData ►Microsoft ►Windows ► Start Menu ►Programs
Click on Everyone and SYSTEM and Tick the box for Full Control, Click "Apply" and "Ok"
Note: Follow the same steps for the Lockheed Martin folder (If its there) Give Full Control for Everyone and SYSTEM
After you complete these steps run the Prepar3D Installer again as administrator
-------------
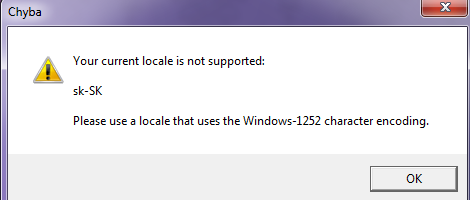
System Locale: If you are receiving a message during the Install process Your current Locale is not supported That message is to let you know that you might experience issues on a non-English type computer.
If you do have Issues, Change your system location to English (US)
For steps to change your System Locale Click here
-------------
Failed to copy resource: If you are receiving a message during the Install process Failed to copy resource Try the following steps
1) Insure you have logged onto your PC as administrator Or Create an administrator account
2) Remove any Special Characters in your Windows User name, Characters like /\[]":;|<>+=,?*
3) Run a Repair on the Client or the setup_Prrepar3D.exe (Depending on which way you were Installing)
If the above steps does not resolve your Issue Create another Windows User Account with Admin privileges, Sign into this new account and launch Prepar3D as Administrator Like this
-------------
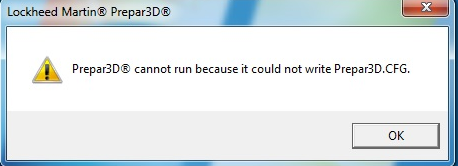
Could not write Prepar3D.cfg: If you are receiving a message during the Install process Could not write Prepar3D.cfg this means due to Read and write permission Issue the Installer could not access and write to the generated folders in the C Drive (Operating system)
The Installation will finish Ok but you will need to change some settings, follow the steps below
1) Insure you are logged into your PC as administrator, If not Create an Admin account and sign in
2) Disable your UAC User Account Control and Restart your computer
3) Check and confirm you have full Read and Write permissions on your C Drive and the Prepar3D.exe
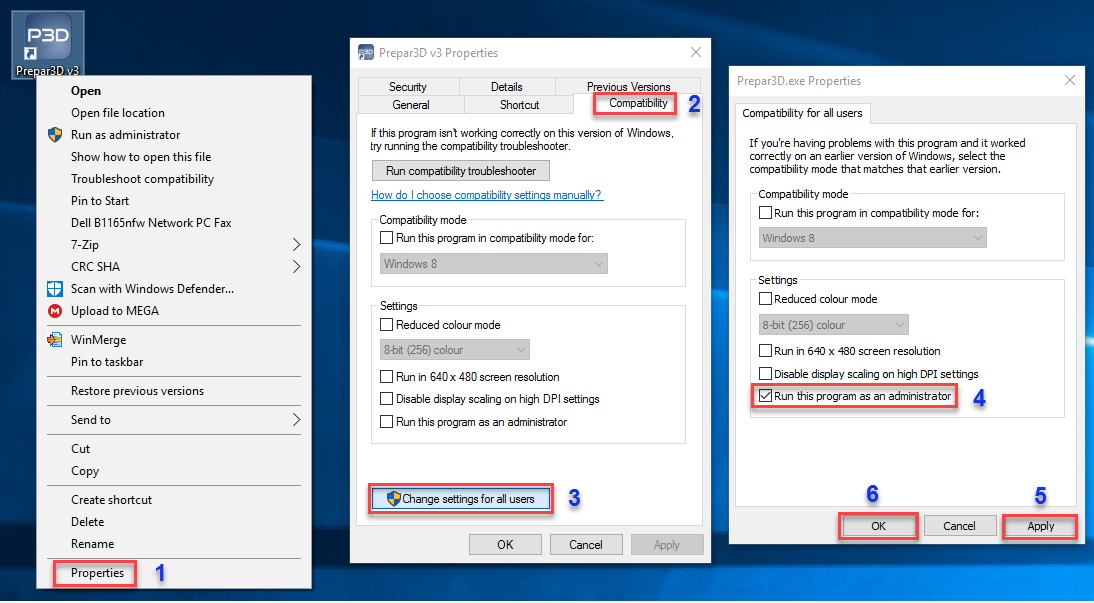
4) Set up Prepar3D to run as Administrator and now launch it
If you are still seeing this message keep the above steps in place and run a Repair on Prepar3D
Run the Installer again and click Repair
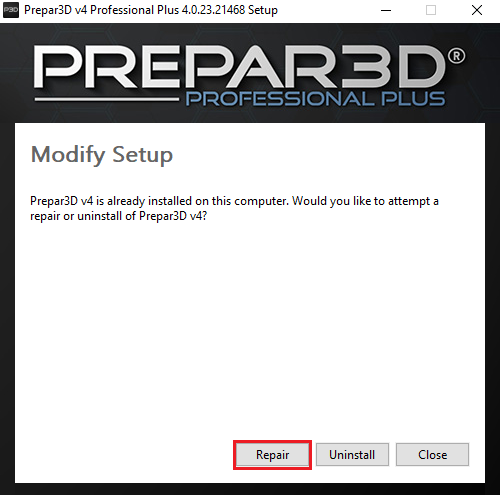
If the above steps does not resolve your Issue Create another Windows User Account with Admin privileges, Sign into this new account and launch Prepar3D as Administrator Like this
-------------------------------------------
For all other error codes like, 0x80070643, 0xfffffff7, 0x800705aa, 0x800713ec, 0x80070005
Go through the checklist below again as you may of missed a step
Checklist, Before you Install Prepar3D.......
- Are you logged onto your PC as administrator ?
- Is your Windows Operating system up to date ?
- Do you have the required hard drive space to Install Prepar3D ? 40 gig in total
- Do you have more them 13 gig of free hard drive space on your Operating system ?
- Did you confirm the MD5 Checksum on the Prepar3D download folder ?
- Did you Disable all Antivirus Software and Firewalls ? Also close them down in the Task Manager
- Did you close programs like Team_Viewer, MSI Afterburner and evga precision in the Task Manager ?
- Did you unplug all Unplug all USB Devices from your computer, except keyboard and mouse ?
- Did you Extract the Zipped folder ?
- Did you run the Prepar3D Installer as administrator ?
Check and confirm the above points and then run the Setup_Prepar3D.exe again as Administrator
===========================================================
===========================================================
IV) Manually Installing Prepar3D
* Installing Prepar3D manually should only be done if running the Setup_prepar3D.exe fails to Install successfully
This process will require you to Install the Prepar3D Component Installers and the Prerequisite Installers Individually
When you have completed this you will have a full Install of Prepar3D
Please Note: Insure you fully update your windows operating system. This should include running Windows Update and updating any drivers to the newest version
---------------------------------------
INDEX
1) Installing the Prepar3D Components Individually
2) Installing the Prerequisite Installers
---------------------------------------
1) Installing the Prepar3D components Individually
First Extract the Zipped folder
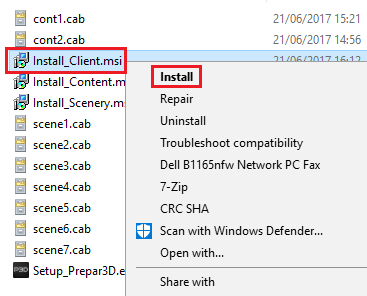
You must Install the Client component first
Right click on Install_Client.msi and click Install, Go through the prompted steps to Install the Client
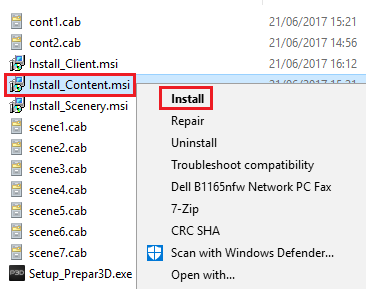
Next: Right click on Install_Content.msi and click Install, The process will shortly finish
Last: Right click on Install_Scenery.msi and click Install, The process will shortly finish
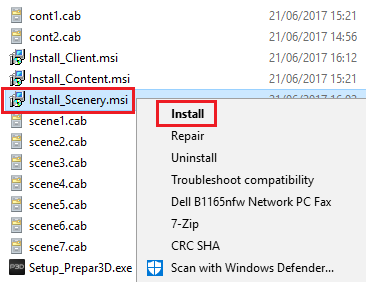
With all 3 components Installed you are now ready to run the prerequisite Installers
----------------------------
2) Installing the prerequisite Installers
Microsoft Visuals
For Prepar3D v4 Microsoft Visuals 2015 is required. For Prepar3D v3 Microsoft Visuals 2013 is required
Prepar3D v4: Download Microsoft Visuals 2015 x86 & x64 Run the Installers as administrator, Restart your computer
Prepar3D v3: Download Microsoft Visuals 2013 x86 & x64 Run the Installers as administrator, Restart your computer
---------
Microsoft .NET Framework
For Prepar3D v4 & v3
Download Microsoft .NET Framework 4.6.2 , Run the Installer as administrator, Restart your computer
---------
Microsoft Core XML (MSXML) 6.0
Download msxmI6_x86.msi, Right click and Install It, The process will shortly finish.
More then likely you already have this prerequisite on your computer
---------
DirectX End-User Runtimes (June 2010)
Before you begin...
Create and Name a new folder anywhere on your PC, For example I created a new folder in my Documents calling it DirectX
I will point the Installer to this folder and extract the files here
1) Download DirectX End-User Runtimes (June 2010)
2) Navigate to your downloads and right click on directx_Jun2010_redist.exe and run as administrator
3) Click Yes to the terms and conditions
4) Click Browse and navigate to your new folder, Click ok. The Installer will extract the files here
5) Open your new folder, Scroll down and right click on DXSETUP.EXE and run as administrator
After the Install process has completed Restart your computer
You are now ready to launch and Activate Prepar3D