

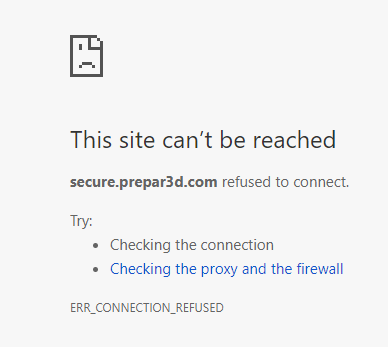
If you are trying to purchase Prepar3D and you are receiving a "This site can't be reached" message whilst in the Store page, Please go through the 5 steps below one by one to help resolve your Issue
* Please Note: You can purchase Prepar3D on any device with an Internet connection, Your activation details will be mailed to your email account
You can purchase Prepar3D with a Visa, MasterCard, or Discover credit card. We are unable to accept PayPal payments at this time, and have no plans to accept PayPal payments in the future.
-------------------------------
1) Try using a different Internet Browser to access the Store page, Maybe try Internet Explorer, Firefox or Google
--------
2) Insure the Windows system Clock and Date is set correct. Incorrect system time and date can lead to website errors, check and confirm your system Time and Date
--------
3) Insure your Antivirus Software Or windows Firewall is not blocking the Store page
--------
4) Flush the windows DSN Caches (Domain Name System) Its possible the DSN caches has become polluted.
This process is quick and easy to complete, Follow the steps in the link provided for Windows 7, 8 and 10 Click Here
--------
5) Check your windows hosts file to Insure secure.prepar3d.com has not been blocked from accessing the Store page.
The hosts file is a computer file that is used by the operating system to map hostnames to IP addresses, Its possible your Malware or Firewall software has added a Block entry to your host file
You can check this by following the steps below.......
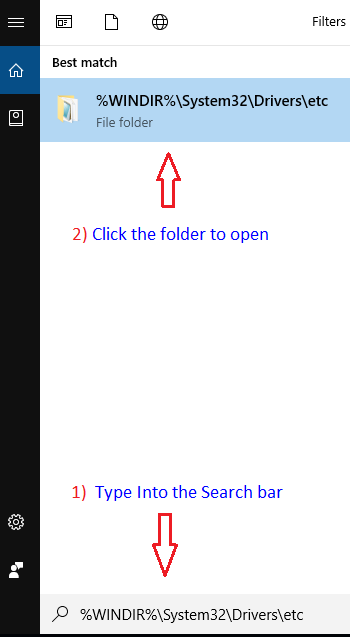
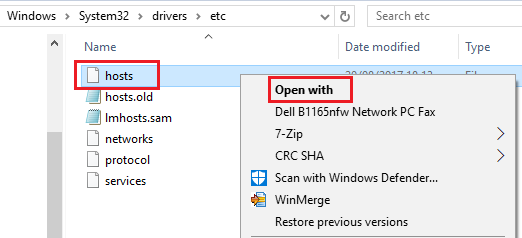
Type %WINDIR%\System32\Drivers\etc into your windows search bar and click on the folder to open
%WINDIR%\System32\Drivers\etc
1 Type the above Tex into your windows search bar. 2 Click on the folder to open
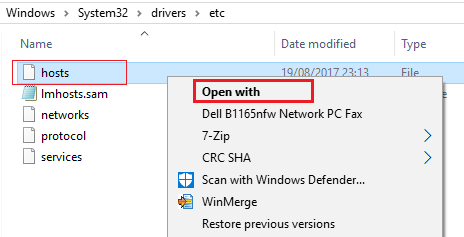
Right click on the hosts file Open with > Notepad
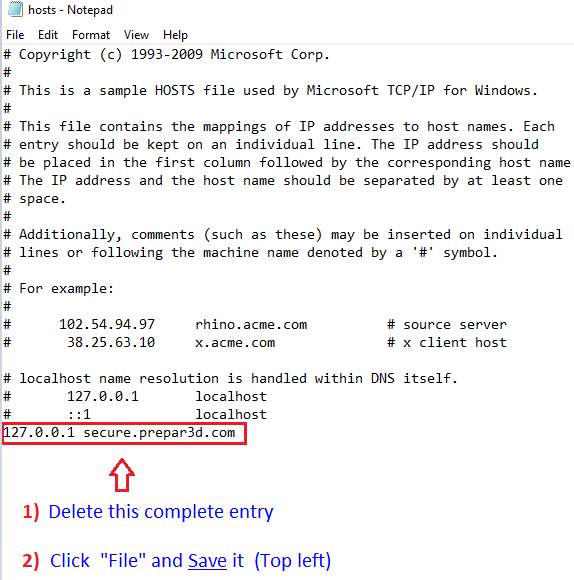
We are now inside the hosts file, Check and Delete any entry that refers to Prepar3D, follow the steps below
1 Delete the complete entry 127.0.0.1 secure.prepar3d.com as seen from the outlined red box.
2 Click File and Save it (Top left)
Please Note: You will need administrator privileges to successfully Delete any entries Inside the hosts File
You can also Click and Drag the hosts file to your Desktop, make the alterations and then move the hosts file back in again
-------
After completing the above steps Click Here and test to see if this has resolved your Issue
When you have successfully purchased Prepar3D please see this link for a guide to Download and Install Prepar3D
------------------------------------------------------------------
------------------------------------------------------------------
Additional Information
Rebuilding the hosts file
If your hosts file has become corrupt you can also rebuild \ recreate this file. For Windows 7, 8 and 10 follow the steps below
We will first save the old hosts file by renaming it to hosts.old and then create a new host file
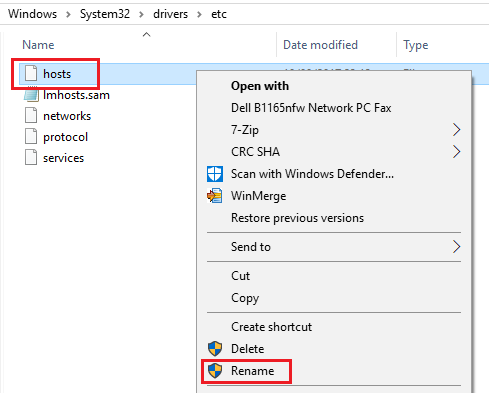
Right click on the hosts file and Rename this file to hosts.old
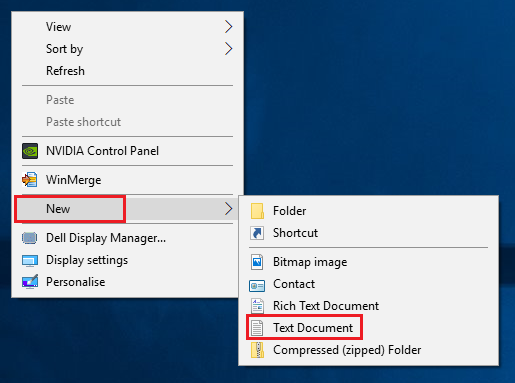
To create a new hosts file, Right click anywhere on your Desktop click New > Tex Document
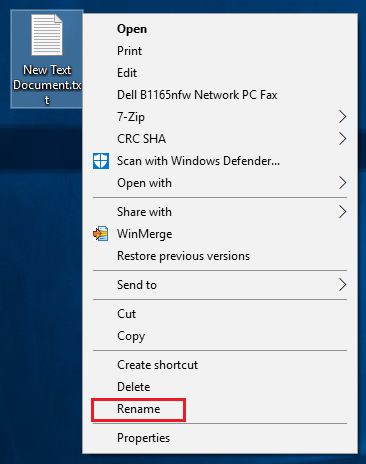
You will now have a little white file on your Desktop, Right click on this file and Rename this to hosts
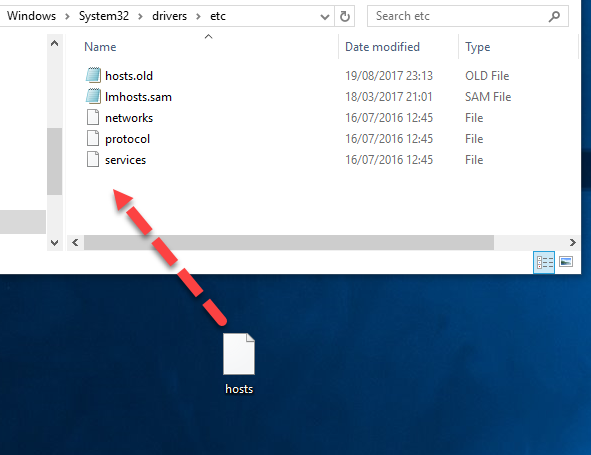
Click and Drag the new hosts file back into the same location
Right click on the new hosts file click Open with > Notepad
Copy the below Tex and Paste it directly into your new hosts file, Insure you click File and Save it (Top left)
# Copyright (c) 1993-2009 Microsoft Corp.
#
# This is a sample HOSTS file used by Microsoft TCP/IP for Windows.
#
# This file contains the mappings of IP addresses to host names. Each
# entry should be kept on an individual line. The IP address should
# be placed in the first column followed by the corresponding host name.
# The IP address and the host name should be separated by at least one
# space.
#
# Additionally, comments (such as these) may be inserted on individual
# lines or following the machine name denoted by a '#' symbol.
#
# For example:
#
# 102.54.94.97 rhino.acme.com # source server
# 38.25.63.10 x.acme.com # x client host
# localhost name resolution is handled within DNS itself.
# 127.0.0.1 localhost
# ::1 localhost
Please Note: You will need administrator privileges to successfully add and save the Tex above to the file
You can also Click and Drag the hosts file to your Desktop, make the alterations and then move the hosts file back in again.